이번 포스트부터 스프링부트를 사용해서 crud 와 로그인, 회원가입 기능을 구현한 게시판을 만들어보려합니다.
먼저 게시판을 만들기 위해 필요한 라이브러리를 설정해보겠습니다.
시작
개발환경은 Eclipse 에서 STS4 를 사용했습니다.
- Eclipse
- STS4 (Spring Tools 4)
New Project 에서 Spring Starter Project 를 클릭합니다.

이번 프로젝트에서 빌드관리도구는 Maven 을 사용했고 자바는 버전8 을 사용합니다.
나머지 그룹과 패키지는 각자 맞게 설정을 해주시면 됩니다.

라이브러리 추가
다음으로 라이브러리 추가를 해보겠습니다.
아래와 같이 총 7개의 라이브러리를 추가하면 됩니다.
- Spring Boot DevTools
- Lombok
- Spring Data JPA
- MySQL Driver
- Spring Security
- Thymeleaf
- Spring Web
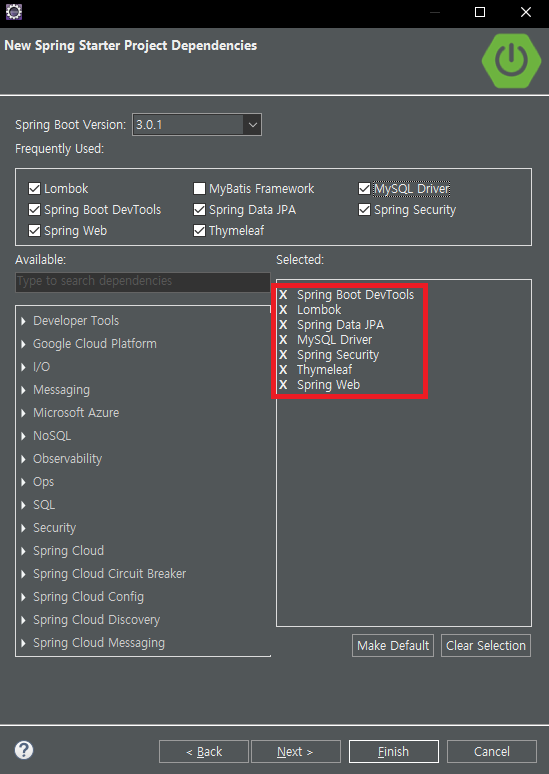
라이브러리 추가를 완료하면 Finish 를 클릭하면 설정이 완료됩니다.
다음으로 프로젝트를 실행해보겠습니다.
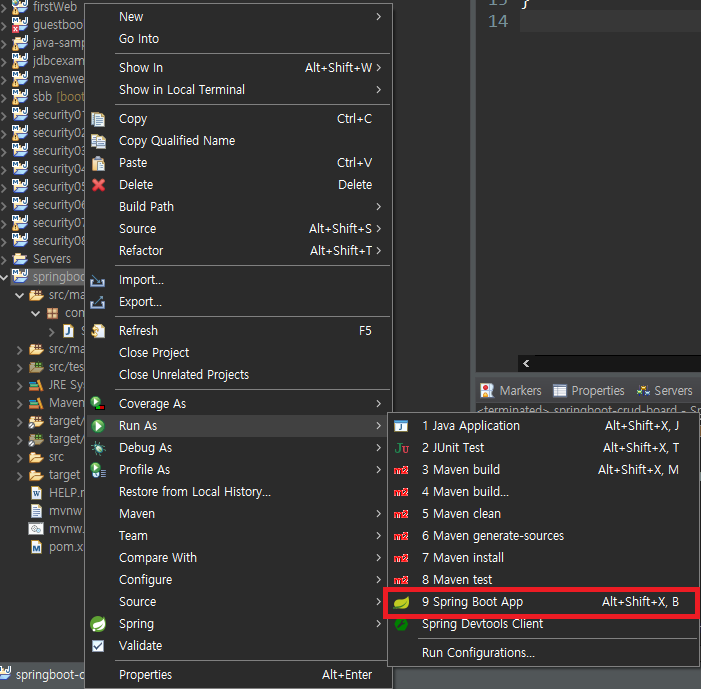
좌측 Project Explorer 에서 프로젝트 이름을 마우스 우클릭을 하고 Run As 에서 Spring Boot App 을 클릭합니다.
. ____ _ __ _ _
/\\ / ___'_ __ _ _(_)_ __ __ _ \ \ \ \
( ( )\___ | '_ | '_| | '_ \/ _` | \ \ \ \
\\/ ___)| |_)| | | | | || (_| | ) ) ) )
' |____| .__|_| |_|_| |_\__, | / / / /
=========|_|==============|___/=/_/_/_/
[32m :: Spring Boot :: [39m [2m (v3.0.1)[0;39m
[2m2023-01-04T11:53:13.193+09:00[0;39m [32m INFO[0;39m [35m97168[0;39m [2m---[0;39m [2m[ restartedMain][0;39m [36mc.crud.SpringbootCrudBoardApplication [0;39m [2m:[0;39m Starting SpringbootCrudBoardApplication using Java 17.0.4.1 with PID 97168 (C:\Users\TEST\eclipse-workspace\springboot-crud-board\target\classes started by TEST in C:\Users\TEST\eclipse-workspace\springboot-crud-board)
[2m2023-01-04T11:53:13.196+09:00[0;39m [32m INFO[0;39m [35m97168[0;39m [2m---[0;39m [2m[ restartedMain][0;39m [36mc.crud.SpringbootCrudBoardApplication [0;39m [2m:[0;39m No active profile set, falling back to 1 default profile: "default"
[2m2023-01-04T11:53:13.237+09:00[0;39m [32m INFO[0;39m [35m97168[0;39m [2m---[0;39m [2m[ restartedMain][0;39m [36m.e.DevToolsPropertyDefaultsPostProcessor[0;39m [2m:[0;39m Devtools property defaults active! Set 'spring.devtools.add-properties' to 'false' to disable
[2m2023-01-04T11:53:13.237+09:00[0;39m [32m INFO[0;39m [35m97168[0;39m [2m---[0;39m [2m[ restartedMain][0;39m [36m.e.DevToolsPropertyDefaultsPostProcessor[0;39m [2m:[0;39m For additional web related logging consider setting the 'logging.level.web' property to 'DEBUG'
[2m2023-01-04T11:53:13.741+09:00[0;39m [32m INFO[0;39m [35m97168[0;39m [2m---[0;39m [2m[ restartedMain][0;39m [36m.s.d.r.c.RepositoryConfigurationDelegate[0;39m [2m:[0;39m Bootstrapping Spring Data JPA repositories in DEFAULT mode.
[2m2023-01-04T11:53:13.756+09:00[0;39m [32m INFO[0;39m [35m97168[0;39m [2m---[0;39m [2m[ restartedMain][0;39m [36m.s.d.r.c.RepositoryConfigurationDelegate[0;39m [2m:[0;39m Finished Spring Data repository scanning in 9 ms. Found 0 JPA repository interfaces.
[2m2023-01-04T11:53:14.236+09:00[0;39m [32m INFO[0;39m [35m97168[0;39m [2m---[0;39m [2m[ restartedMain][0;39m [36mo.s.b.w.embedded.tomcat.TomcatWebServer [0;39m [2m:[0;39m Tomcat initialized with port(s): 8080 (http)
[2m2023-01-04T11:53:14.246+09:00[0;39m [32m INFO[0;39m [35m97168[0;39m [2m---[0;39m [2m[ restartedMain][0;39m [36mo.apache.catalina.core.StandardService [0;39m [2m:[0;39m Starting service [Tomcat]
[2m2023-01-04T11:53:14.246+09:00[0;39m [32m INFO[0;39m [35m97168[0;39m [2m---[0;39m [2m[ restartedMain][0;39m [36mo.apache.catalina.core.StandardEngine [0;39m [2m:[0;39m Starting Servlet engine: [Apache Tomcat/10.1.4]
[2m2023-01-04T11:53:14.318+09:00[0;39m [32m INFO[0;39m [35m97168[0;39m [2m---[0;39m [2m[ restartedMain][0;39m [36mo.a.c.c.C.[Tomcat].[localhost].[/] [0;39m [2m:[0;39m Initializing Spring embedded WebApplicationContext
[2m2023-01-04T11:53:14.318+09:00[0;39m [32m INFO[0;39m [35m97168[0;39m [2m---[0;39m [2m[ restartedMain][0;39m [36mw.s.c.ServletWebServerApplicationContext[0;39m [2m:[0;39m Root WebApplicationContext: initialization completed in 1080 ms
[2m2023-01-04T11:53:14.377+09:00[0;39m [33m WARN[0;39m [35m97168[0;39m [2m---[0;39m [2m[ restartedMain][0;39m [36mConfigServletWebServerApplicationContext[0;39m [2m:[0;39m Exception encountered during context initialization - cancelling refresh attempt: org.springframework.beans.factory.UnsatisfiedDependencyException: Error creating bean with name 'dataSourceScriptDatabaseInitializer' defined in class path resource [org/springframework/boot/autoconfigure/sql/init/DataSourceInitializationConfiguration.class]: Unsatisfied dependency expressed through method 'dataSourceScriptDatabaseInitializer' parameter 0: Error creating bean with name 'dataSource' defined in class path resource [org/springframework/boot/autoconfigure/jdbc/DataSourceConfiguration$Hikari.class]: Failed to instantiate [com.zaxxer.hikari.HikariDataSource]: Factory method 'dataSource' threw exception with message: Failed to determine a suitable driver class
[2m2023-01-04T11:53:14.379+09:00[0;39m [32m INFO[0;39m [35m97168[0;39m [2m---[0;39m [2m[ restartedMain][0;39m [36mo.apache.catalina.core.StandardService [0;39m [2m:[0;39m Stopping service [Tomcat]
[2m2023-01-04T11:53:14.397+09:00[0;39m [32m INFO[0;39m [35m97168[0;39m [2m---[0;39m [2m[ restartedMain][0;39m [36m.s.b.a.l.ConditionEvaluationReportLogger[0;39m [2m:[0;39m
Error starting ApplicationContext. To display the condition evaluation report re-run your application with 'debug' enabled.
[2m2023-01-04T11:53:14.416+09:00[0;39m [31mERROR[0;39m [35m97168[0;39m [2m---[0;39m [2m[ restartedMain][0;39m [36mo.s.b.d.LoggingFailureAnalysisReporter [0;39m [2m:[0;39m
***************************
APPLICATION FAILED TO START
***************************
Description:
Failed to configure a DataSource: 'url' attribute is not specified and no embedded datasource could be configured.
Reason: Failed to determine a suitable driver class
Action:
Consider the following:
If you want an embedded database (H2, HSQL or Derby), please put it on the classpath.
If you have database settings to be loaded from a particular profile you may need to activate it (no profiles are currently active).스프링부트 프로젝트가 실행되지만 Failed to configure a DataSource 라는 메세지가 출력이 됩니다.
이것은 MySQL Driver 를 추가했는데 데이터베이스와 연결이 되어 있지 않아서 발생하는 오류입니다.
MariaDB [(none)]> create database springboot_crud default character set utf8;
Query OK, 1 row affected (0.003 sec)

MariaDB [(none)]> show databases;
+--------------------+
| Database           |
+--------------------+
| blog               |
| board              |
| information_schema |
| javasample         |
| local              |
| mysql              |
| performance_schema |
| springboot_crud    |
| test               |
+--------------------+
9 rows in set (0.001 sec)
MariaDB 에 접속해서 springboot_crud 라는 데이터베이스를 생성했습니다.
(저는 MariaDB 를 사용하고 있는데 MySQL 과 MariaDB 모두 MySQL Driver 를 통해 사용가능합니다.)
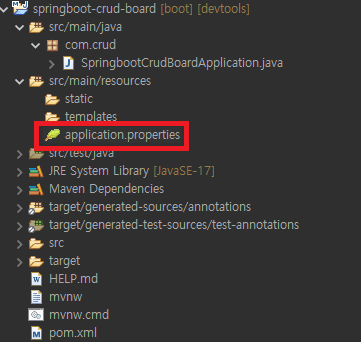
다음으로 resources 디렉토리에 있는 application.properties 에서 DB 설정을 해줘야합니다.
application.properties 파일을 열어 다음과 같이 입력해줍니다.

url 의 마지막 부분에는 위에서 만든 DB 의 이름을 입력하고
username 과 password 는 mysql 의 username 과 password 를 입력해주시면 됩니다.
브라우저 접속
DB 설정을 완료하였으면 프로젝트를 실행하고 브라우저로 접속을 해보겠습니다.
(스프링부트의 포트는 8080번으로 localhost:8080 을 입력하면 됩니다.)
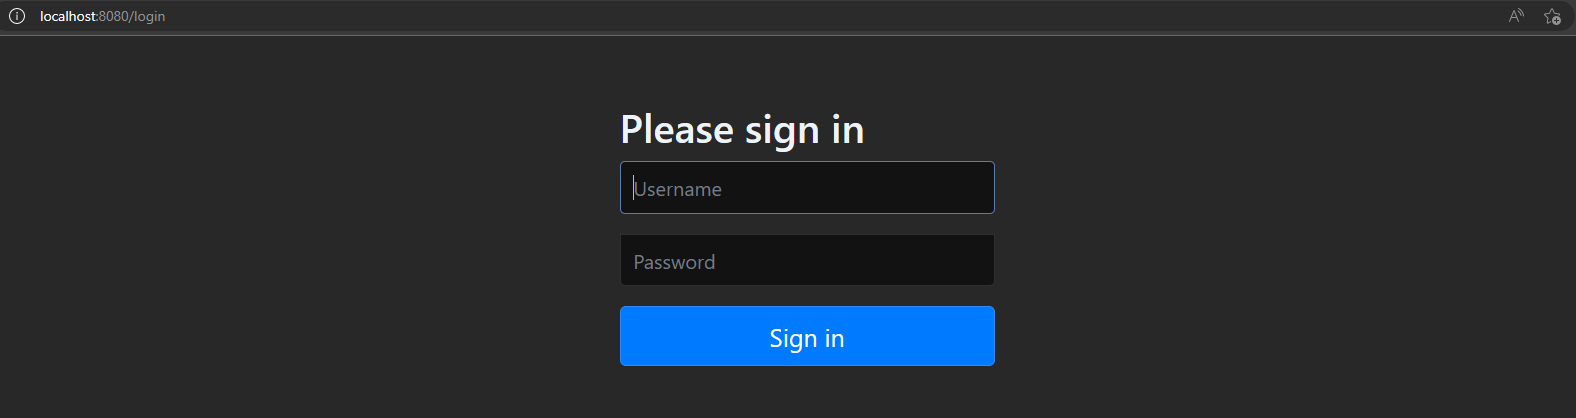
접속을 하면 위와 같이 로그인을 하는 페이지가 나타납니다.
이는 Spring Security 라이브러리 때문에 나타나는것인데 Eclipse 콘솔창의 출력 메세지를 보면 아래와 같습니다.
Using generated security password: 6cca5ada-ac97-4e2f-ad32-1c17eca712ef
This generated password is for development use only. Your security configuration must be updated before running your application in production.
[2m2023-01-04T12:18:58.587+09:00[0;39m [32m INFO[0;39m [35m104064[0;39m [2m---[0;39m [2m[ restartedMain][0;39m [36mo.s.s.web.DefaultSecurityFilterChain [0;39m [2m:[0;39m Will secure any request with [org.springframework.security.web.session.DisableEncodeUrlFilter@684e03d2, org.springframework.security.web.context.request.async.WebAsyncManagerIntegrationFilter@50a2dc21, org.springframework.security.web.context.SecurityContextHolderFilter@3b82a05c, org.springframework.security.web.header.HeaderWriterFilter@66790357, org.springframework.security.web.csrf.CsrfFilter@1f218f40, org.springframework.security.web.authentication.logout.LogoutFilter@8136585, org.springframework.security.web.authentication.UsernamePasswordAuthenticationFilter@223ef2c1, org.springframework.security.web.authentication.ui.DefaultLoginPageGeneratingFilter@74b00335, org.springframework.security.web.authentication.ui.DefaultLogoutPageGeneratingFilter@104c3f21, org.springframework.security.web.authentication.www.BasicAuthenticationFilter@367667c, org.springframework.security.web.savedrequest.RequestCacheAwareFilter@5d360ab5, org.springframework.security.web.servletapi.SecurityContextHolderAwareRequestFilter@67b89bd8, org.springframework.security.web.authentication.AnonymousAuthenticationFilter@6416ce8e, org.springframework.security.web.access.ExceptionTranslationFilter@58ad0009, org.springframework.security.web.access.intercept.AuthorizationFilter@1ac24e]
[2m2023-01-04T12:18:58.615+09:00[0;39m [32m INFO[0;39m [35m104064[0;39m [2m---[0;39m [2m[ restartedMain][0;39m [36mo.s.b.d.a.OptionalLiveReloadServer [0;39m [2m:[0;39m LiveReload server is running on port 35729
[2m2023-01-04T12:18:58.652+09:00[0;39m [32m INFO[0;39m [35m104064[0;39m [2m---[0;39m [2m[ restartedMain][0;39m [36mo.s.b.w.embedded.tomcat.TomcatWebServer [0;39m [2m:[0;39m Tomcat started on port(s): 8080 (http) with context path ''
[2m2023-01-04T12:18:58.660+09:00[0;39m [32m INFO[0;39m [35m104064[0;39m [2m---[0;39m [2m[ restartedMain][0;39m [36mc.crud.SpringbootCrudBoardApplication [0;39m [2m:[0;39m Started SpringbootCrudBoardApplication in 2.735 seconds (process running for 3.401)Username 은 user, password 는 Using generated securiy password 의 값을 복사해서 로그인을 하면 됩니다.

로그인을 하면 다음과 같은 페이지가 나타나는데 아직 Controller 설정을 해주지 않아
페이지가 없어서 404 에러가 나타납니다.
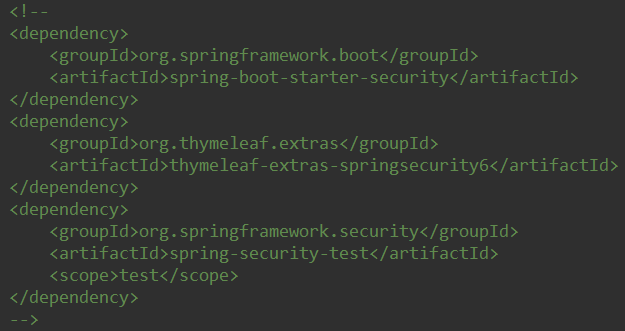
저희는 아직 Spring Security 를 사용하지 않을것이기 때문에 Spring Secuiry 관련 라이브러리는 주석처리를 하겠습니다.
- sprinb-boot-starter-security
- thymeleaf-extras-springsecurity6
- spring-security-test

추가한 라이브러리는 pom.xml 에서 확인할 수 있습니다.
여기까지 스프링부트 설정과 라이브러리를 추가를 완료했습니다.

src/main/java 디렉토리의 패키지 안에 controller 패키지를 만든 후 Main.java 를 다음과 같이 생성합니다.
package com.crud.controller;
import org.springframework.stereotype.Controller;
import org.springframework.web.bind.annotation.GetMapping;
import org.springframework.web.bind.annotation.ResponseBody;
@Controller
public class Main {
@ResponseBody
@GetMapping("/")
public String index() {
return "hello";
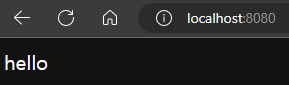
}
}브라우저를 통해 localhost:8080/ 로 접속하면 hello 라는 문구가 출력되는것을 볼 수 있습니다.
'Spring > Springboot 실습' 카테고리의 다른 글
| 게시판 만들기 - 질문 상세페이지 작성 (0) | 2023.01.08 |
|---|---|
| 게시판 만들기 - service 작성 (0) | 2023.01.08 |
| 게시판 만들기 - 브라우저를 통한 데이터 출력 (0) | 2023.01.08 |
| 게시판 만들기 - Repository 작성 (0) | 2023.01.06 |
| 게시판 만들기 - JPA 를 통한 테이블 생성 (0) | 2023.01.05 |
